With the ongoing pandemic when paying regular visits to your salon has become risky, having a simple DIY guide on how to bleach hair at home can be a great boon in disguise. Moreover, who doesn’t like saving some extra bucks by skipping the costly salon visits?
Having a good hair day can instantly add tons of confidence to your personality. Giving your hair a new makeover can visibly enhance your beauty while also letting you experiment with different hair colors and styling techniques.
But, before you decide to take the plunge and add some pop of color to your hair, it’s always suggested you know the ins and outs of how to bleach hair; safely and effectively.
Here’s a simple step by step guide on how to bleach hair at home:

Know the Science Behind Bleaching Your Hair
Before you start preparing how to bleach hair at home, let us understand the process of bleaching your hair. Bleaching is a chemical process that breaks through your hair shaft and oxidizes the melanin present in the hair. Melanin is a pigment that gives color to our hair. This process may cause hair damage to some extent.
But, worry not! You can effectively minimize or even reverse the damage in no time by following the bleaching hair instructions correctly and taking utmost hair care.
Prepping your Hair for the Bleach Job
It’s always best to start prepping your hair well in advance before the actual D-day. We suggest you begin preparing as early as 2 to 4 weeks in advance. Prepping in advance will not only smoothen the hair bleaching process but also ensure minimal hair damage.
Simple Ways to Prep for Bleaching Your Hair at Home
Conditioning and Oiling: Never Underestimate the Power of Age-Old Formulas
Just like your skin, your hair also needs regular nourishment and care. Deep-conditioning twice a week can do wonders to your hair and leave them smooth, shiny, and frizz-free. Homemade conditioning masks with ingredients such as banana, honey, curd, eggs or avocado can quickly and effectively help restore your hair’s health.
Oiling is another age-old formula to strengthen your hair from tip to root by locking in the moisture and providing your hair with the necessary hydration. You can apply readily available oils such as coconut oil, olive oil, or castor oil to your scalp and along the lengths of your hair at least twice a week before cleansing your hair.
Lastly, remember to wash your hair with a sulfate-free and paraben-free shampoo as these compounds can drastically worsen your hair quality by excessively drying out hair strands.
While bleaching hair at home, avoid heat styling and chemical treatments
No matter what, avoid heat styling or chemical treatments at all costs before a bleach job, as these can rip off the moisture content from your hair and make them look dull and frizzy. Bleaching can further deteriorate such treated hair and make them brittle and penetrable.
Always remember that bleaching works best on untreated or virgin hair. Take a break from any heat styling or coloring before you start bleaching your hair.
Products and Tools You’ll Need for the Bleach Job
- Hair bleach powder of your choice
- Developer or peroxide
- Brush to apply the bleach
- Mixing bowl
- Combs (Large and tail combs)
- Sectioning clips
- Shower cap
- Latex gloves
- Towels
- Old t-shirts/gown
- Sulfate and paraben-free shampoo
- Protein-rich conditioner
A Super Effective DIY Step by Step Hair Bleaching Process at Home

Step 1. Remember, If a Professional Colorist can, so can you
Firstly, pat yourself on the back for not letting the pandemic come into your way of prioritizing self-care. Bleaching your hair at home may seem tedious or complex, but it is an entirely safe and doable job if you follow all the instructions step by step. Cheer up, let go of the procrastination, remember, you too can do it as easily as any other professional colorist. Now that you have prepared yourself to take the great plunge, finally collect all the bleach supplies and head to a well-ventilated and well-lit space.
Step 2. Change into a Comfortable Attire and Put on Those Gloves
Wear any old piece of clothing, preferably a loose t-shirt or a gown. Bleach can ruin fabrics, so you have to be extra careful as the hair bleaching process can be messy, and you don’t want to spoil new clothes. Loose and comfortable clothing will also ensure that you can immediately wash off your hair when the timer goes off. If you accidentally spill the product on the floor, immediately wipe it off.
Step 3. Sectioning the Hair
For sectioning the hair, you’ll need a tail comb, a large comb, and sectioning clips. Slowly divide your hair into small sections with the help of a tail comb and use sectioning clips to secure your crown section hair to one side. It’s always better to start with the bottom sections.
Step 4. Combine Bleach Powder and Developer
To a mixing bowl, add the bleach powder and developer. A developer, also known as an activator or a peroxide, is a creamy product that can activate the bleach and lighten your hair. It contains hydrogen peroxide that reacts with bleach to give us the final product. The developer is available in different volumes. Developer volume is indicative of the strength of the peroxide present in the developer.
Before blending the products, note down the golden rule of mixing bleach powder and developer, “Always add two parts of developer/peroxide for one part of hair bleach powder.” Ensure that the resultant mixture is consistent and lump-free.
Step 5. Apply the Bleach Uniformly – One of the most important steps of the “How to bleach your hair at home” guide
We have finally reached the most awaited step of the “how to bleach hair at home” guide. This step can make or break the deal. So it’s crucial to be cautious while you apply the bleach to your hair. Apply the bleach uniformly to all hair strands. Secure away your crown with sectioning clips and start working with the bottom sections first.
We recommend beginning along the lengths and tips of the hair. The bleach processes faster at the roots than the tips and mid-lengths, so it’s convenient to apply the bleach first to the lengths and later to the roots of your hair. Be careful not to get the bleach on your skin.
Step 6. Covering Your Hair with a Shower Cap and Letting the Bleach Sit
First, apply the bleach to the bottom sections of your hair, then move on to the rest of your hair and spread evenly. Repeat the process as mentioned in Step 5. Finally, let the bleach sit in your hair for the exact time, as is mentioned in the bleaching hair instructions of the bleach kit.
In any case, do not leave the bleach in hair beyond 20-45 minutes. Though it is rare, if you notice any irritation, itching, or redness, immediately wash off the bleach and consult a doctor.
Step 7. Cleansing with Balancing shampoo and a Nourishing Conditioner
Cleanse thoroughly with a balancing shampoo that balances the moisture levels in your scalp and hair while entirely washing off the bleach from your hair strands. Finish with a nourishing conditioner that provides your hair with deep hydration.
Avoid using the conditioner on your scalp. You can also use the extra nourishing conditioner available with bleach kits specially formulated for post-bleach purposes. Thoroughly rinse off the remaining conditioner and let your hair dry.
Step 8. Toning (This is an optional step)
All those who are not fond of warmer yellow tones that appear post bleaching can use toner for an even hair tone and brightness. If you want to leave your hair blonde, you can apply toner to get rid of the unwanted warmer tones.
It neutralizes any brassier tones and gives your hair a cool white undertone. It is used on damp hair and sits in hair for about 15-20 minutes. Once again, rinse your hair thoroughly. Alternatively, you can substitute a purple shampoo in Step 7. to get cooler tones.
Step 9. Coloring Your Hair (This is an optional step)
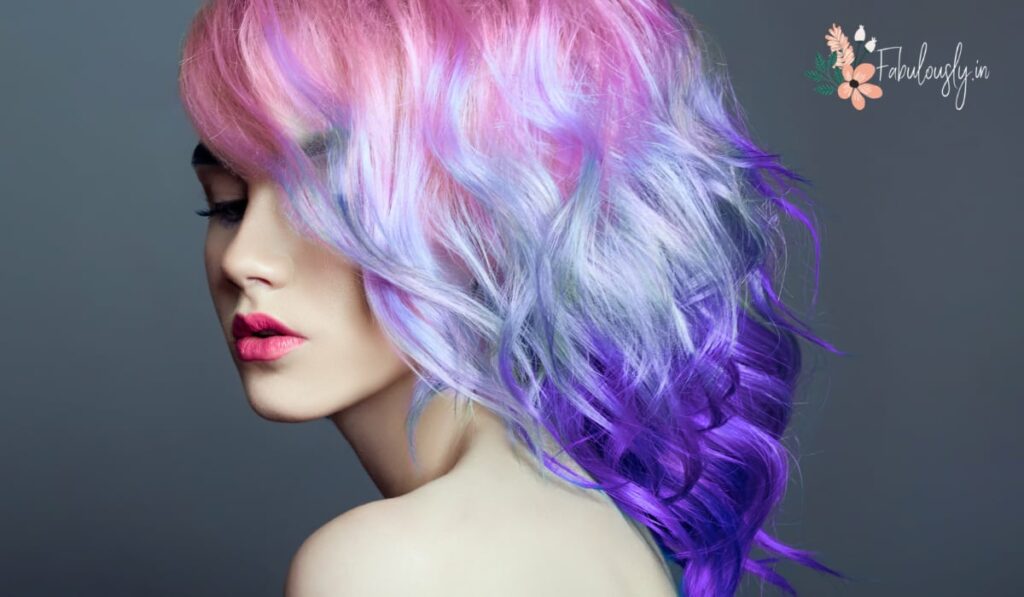
Bleaching your hair forms a necessary part of the process of coloring hair. If you are looking for a color other than blonde, you can opt for a store-bought semi-permanent color and directly apply it to bleached hair. These colors are available in various shades and let you play with different hues and different hair color techniques like ombré or balayage.
Congratulations! You are now equipped with the necessary know-how of bleaching your hair at home. Go ahead, grab those bleach supplies and get ready to witness some magic.
Bleaching Your Hair at Home- Post-Bleaching Hair Care Tips that Work Like Magic

Ta-da! Now that you have learned the art of how to bleach your hair safely at home, it’s time to up your hair care game. Post-bleach hair care is the most crucial step in the entire hair bleaching process, as the health of your hair solely depends on your hair care routine. Bleaching, being a harsh chemical process, not only results in breaking the melanin in your hair cuticle and hair lightening but also makes it prone to severe hair damage.
Further, it can make your hair susceptible to brittleness, hair breakage, decreased porosity, permeability, protein loss, scalp burns, and skin irritation.
But, whatever may be the hair damage, fret not because we have got you covered. Follow these basic, tried, and tested tips for a wholesome and flawless post-bleach hair care routine.
Building a Full-Proof Color-Treated Hair Care regime
To keep your bleached strands from becoming susceptible to significant hair damage, you’ll need to choose a hair care regime that works best for you. Suppose you have bleached your hair as part of the coloring or highlighting job. In that case, you’ll require a color-protectant shampoo-conditioner combination that not only maintains your hue for a longer time but also keeps it healthy. Look for hair products that do not contain harsh compounds such as sulfates, parabens, or alcohols.
Including a Toning Shampoo in Your Hair Care Plan
To maintain cooler hair tones and get rid of the unwanted warmer tones, always include a purple shampoo in your hair care plan. Purple shampoos are toning shampoos that are designed especially for bleached hair. These shampoos neutralize brassy, yellow, or orange tones and give your hair an instant shine.
Minimizing the Use of Conditioners
Perpetual application of conditioners on bleached hair can worsen hair quality. Minimize using conditioners as much as possible, especially on your scalp, to avoid the concentration of chemicals in hair.
Sparing Time for Root Touch-ups
To ensure minimal damage with an easy application process, we suggest root touch-ups when the roots are about half an inch long. You can schedule root touch-ups anytime between 2 to 8 weeks after coloring.
Substituting Your Regular Hair Products with Organic Ingredients
Always opt for hair products with natural and organic ingredients as these can maintain healthy hair without causing further damage.
Diligently Oiling and Deep-Conditioning Twice a Week
No matter what, remember to diligently oil hair and deep-condition with rich and nourishing conditioning masks at least twice a week. Both these self-care methods can significantly strengthen your hair and speed up hair damage reversal. You can easily prepare hair conditioning masks from simple kitchen ingredients like olive oil, honey, banana, curd, or eggs.
Minimizing Heat Styling and Chemical Treatments
Steer clear of heat styling for at least 2 to 3 weeks after bleaching as it can be detrimental to your hair health and slow down the process of healing. If heat styling is necessary and you cannot skip it, remember to use a hair protection spray.
Embracing the Glorious Mess That You Are
It’s completely normal not to achieve desired results the first time you try a new makeover. It’s alright not to be able to choose the right kind of look for your hair. Bleaching your hair at home can be tricky the first time you try it but surely gets easier with practice and time. Know that our looks are just an outer reflection of our personality. Ultimately, true beauty lies in the virtues of the inner self. What matters is that we keep experimenting and keep going on even if we may mess up at times.
How to Bleach Hair at Home- Some Pro-Tips to Your Rescue

Pro-Tip 1: Cleanse your hair with lukewarm water only
Always cleanse your hair in lukewarm water instead of hot water to prevent loss of essential oils from hair.
Pro-Tip 2: Remember to wear old and loose clothes while bleaching your hair
Always put on old and loose clothes while bleaching your hair. Bleach is known to be a notorious chemical and can damage your clothing. Spread old rugs or newspapers on the floor to avoid spilling the bleach on the floor.
Pro-Tip 3: Choose a well-ventilated and well-lit place
Ensure that your room is well-ventilated to avoid any noticeable chlorine-like odor. Also, ensure that your room has good lighting so that your hair is clearly visible and can be properly bleached. Always keep a mirror and a tail comb handy.
Pro-Tip 4: Never Skip a Purple Shampoo after Bleaching Your Hair at Home
A purple shampoo, also known as a toning shampoo, is a blessing for bleached hair. A professional colorist always uses a toning shampoo after the bleach job. That is what adds the perfect shine to your hair after visiting a salon. It keeps those brassy yellowish orange tones away and gives your hair a fresh cool undertone.
Pro-Tip 5: Including a Good Diet is Super Essential
Nourish your hair with a good diet. Including foods such as eggs, spinach, pumpkin, carrots, nuts, and citrus fruits can strengthen your hair and keep them healthy. Pay attention to your diet and notice a profound change in your hair in just some weeks.
Well, that’s all, folks!
Bleaching your hair at home has never been this easier and simpler. All you have to do is prepare in advance and keep the bleach supplies ready. Self-confidence is the key while bleaching your hair right or going for any hair makeover. Don’t forget to keep in mind these simple tips and tricks that can go a long way in your “how to bleach hair at home” journey.
FAQs
Is bleaching my hair at home safe?
Absolutely. Bleaching your own hair at home is safe, doable, and effective if you follow all the bleaching hair instructions mentioned on the bleach kits. Take basic precautions such as wearing old clothes and hand gloves. Additionally, keep in mind to wash off the bleach within 20-45 minutes of applying.
I bleached my hair a few weeks ago. When can I bleach and dye hair again?
It’s necessary to space out your hair bleaching sessions at least a month apart so that you do not overprocess and damage your hair. If you have dark hair, such as black or brown hair, you’ll require more than one session to achieve the desired lift.
How to mix bleach and developer?
Remember the golden rule of mixing two parts of developer for every one part of hair bleach powder. Ensure that the mixture is consistent and lump-free.
What bleach can I use for my hair?
Always invest in a good quality hair bleach powder from a well-known and trustworthy brand. Never substitute skin bleach for hair bleach, as it can turn out to be disastrous.
Are there any side effects of bleaching your hair? How can we minimize them?
Yes. There are specific side effects of bleaching your hair: brittleness, hair breakage, protein loss, decreased porosity, permeability, and skin irritation. With a consistent hair care routine, you can minimize or even reverse the damage. Incorporating deep-conditioning, oiling, and avoiding heat styling can help with reducing side effects.
